Deploying Nutanix Enterpise AI on MicroK8s: A Home Lab Validation Guide (Not for Production)
Why this exists
AI projects rarely fail because the models are bad. They fail because the plumbing is painful.
In the real world, teams don’t struggle with training runs or benchmark scores, they struggle with:
- Standing up infrastructure that works consistently
- Exposing models safely to developers and applications
- Managing lifecycle, upgrades, certificates, gateways, and permissions
- Repeating all of the above across edge, datacenter, and cloud
What starts as a proof of concept often collapses under its own operational weight.
This is exactly the gap Nutanix Enterprise AI is designed to close.
In this article, I’ll walk through deploying Nutanix Enterprise AI on MicroK8s running on Ubuntu 24.04 in a home lab. This is not production guidance. This is about validating functionality, understanding the architecture, and experiencing how Nutanix simplifies AI operations end‑to‑end.
The real problem with AI deployments
Most AI platforms look simple in diagrams and brutal in practice.
You typically end up stitching together:
- A Kubernetes platform
- GPU or accelerator enablement
- Model servers
- Ingress and gateway layers
- Certificates and identity
- Storage for artifacts and embeddings
- Monitoring and lifecycle tooling
Every layer comes with its own YAML dialect, upgrade cadence, and failure modes.
By the time a developer can send a single inference request, weeks have passed and the platform team is already firefighting.
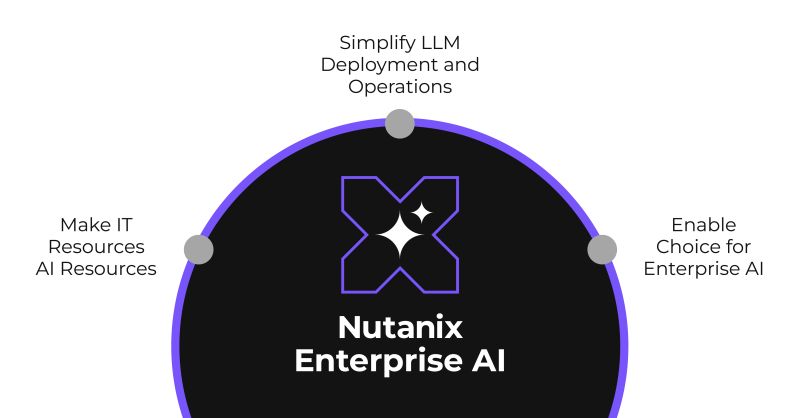
Nutanix Enterprise AI changes the equation
Nutanix Enterprise AI focuses on operational simplicity:
- One consistent experience from edge to datacenter to public cloud
- Opinionated defaults that work
- A clean separation between infrastructure concerns and application consumption
The goal isn’t to remove Kubernetes, it’s to make Kubernetes feel boring again.
Nutanix Enterprise AI deployment models
One of the most overlooked strengths of Nutanix Enterprise AI is that it isn’t a single rigid architecture. You can adopt it in stages, depending on where you are.
1. Full stack Private AI
This is the complete, vertically integrated offering:
- Infrastructure
- Kubernetes platform (NKP)
- Nutanix Enterprise AI services (NAI)
- GPU and accelerator enablement
- End‑to‑end lifecycle management
This is the model for organisations that want a turnkey private AI platform with minimal integration overhead.
2. Bare metal NKP + NAI
Here, you bring the hardware and deploy:
- Nutanix Kubernetes Platform
- Nutanix Enterprise AI services
This appeals to teams standardising on Kubernetes but still wanting a curated AI stack without running a full HCI layer.
3. Standalone NAI on any CNCF‑conformant Kubernetes
This is where the home lab comes in.
Nutanix Enterprise AI can run on any CNCF‑conformant Kubernetes platform, including:
- OpenShift
- VMware Tanzu on VCF
- Public Cloud Kubernetes such as Amazon EKS
- Lightweight distributions like MicroK8s
This makes it ideal for:
- Validation
- Architecture familiarisation
- Integration testing
- Skill development
- Public cloud deployment
That’s exactly what we’re doing here.
Important disclaimers (read this)
This deployment:
- Is not supported for production
- Is not hardened
- Is not sized for performance
It exists purely to:
- Test functionality
- Understand architecture
- Explore workflows
If something breaks, that’s part of the learning.
Lab environment overview
Operating system
- Ubuntu 24.04.4, both Desktop and Server
Kubernetes distribution
- MicroK8s 1.32.9
Nutanix Enterprise AI version
- NAI 2.5
For NAI 2.7, please go to the bottom of this blog and locate the NAI 2.7 install script zip file
Prerequisites
Before touching Kubernetes, make sure you have the following in place.
Container registry access
You will need:
- A Docker.io username associated with your Nutanix account
- An API key
- An associated email address
These credentials are required to pull Nutanix Enterprise AI images.
Required Files and keys – Extremely important, do not skip this!
Ensure the following exist in your working directory:
- Host keychain
- Private key
- Download values.yaml
- If you want to automate the deployment, run the runme1st.sh and then the naiinstall.sh file I have created (Right click on the links and choose save as…)
For the keychain and private key, if you do not have this already, you can use the ssl-cert to do this, easiest way is as follows:
sudo apt install ssl-cert
cp /etc/ssl/certs/ssl-cert-snakeoil.pem ./fullchain1.pem
sudo cp /etc/ssl/private/ssl-cert-snakeoil.key ./privkey1.pem
sudo chown $USER:$USER privkey1.pem
They must be located in ./ as referenced by the deployment manifests.
Step 1: Enable IPv6
NAI 2.5 introduces services that require IPv6, including ClickHouse.
If IPv6 is not enabled:
- Pods will fail to start
- Services will remain unreachable
- Debugging becomes unnecessarily painful
Before enabling anything, first check whether IPv6 is already active on your host.
sysctl -n net.ipv6.conf.all.disable_ipv6 2>/dev/null
Interpreting the result:
0→ IPv6 is enabled ✅1→ IPv6 is disabled ❌
If IPv6 is disabled, it must be enabled before proceeding with any Nutanix Enterprise AI components. Skipping this step will cause subtle and hard-to-diagnose failures later in the deployment.
Step 2: Install MicroK8s (1.32)
We’ll use MicroK8s 1.32 for this lab.
Why MicroK8s?
- Lightweight
- CNCF-conformant
- Fast to iterate
- Perfect for single-node validation
Install MicroK8s using snap:
sudo snap install microk8s --classic --channel=1.32/stableAfter installation completes, verify that the service is running before moving on to the next steps.
Step 3: Install kubectl
While MicroK8s includes its own kubectl wrapper, installing kubectl directly simplifies tooling compatibility and avoids surprises when following upstream Kubernetes documentation.
Install kubectl using the official Kubernetes APT repository:
sudo apt-get update
sudo apt-get install -y apt-transport-https ca-certificates curl gnupg
curl -fsSL https://pkgs.k8s.io/core:/stable:/v1.34/deb/Release.key | sudo gpg --dearmor -o /etc/apt/keyrings/kubernetes-apt-keyring.gpg
sudo chmod 644 /etc/apt/keyrings/kubernetes-apt-keyring.gpg
echo 'deb [signed-by=/etc/apt/keyrings/kubernetes-apt-keyring.gpg] https://pkgs.k8s.io/core:/stable:/v1.34/deb/ /' | sudo tee /etc/apt/sources.list.d/kubernetes.list
sudo chmod 644 /etc/apt/sources.list.d/kubernetes.list
sudo apt-get update
sudo apt-get install -y kubectl
Once installed, confirm kubectl is available on your path before continuing.
Step 4: Install Helm
Helm is used to install and manage several platform components in a clean, repeatable way. In this lab, it helps keep deployments predictable and easier to reason about when something needs to be inspected or removed.
Install Helm using the official Helm repository:
sudo apt-get install curl gpg apt-transport-https --yes
curl -fsSL https://packages.buildkite.com/helm-linux/helm-debian/gpgkey | gpg --dearmor | sudo tee /usr/share/keyrings/helm.gpg > /dev/null
echo "deb [signed-by=/usr/share/keyrings/helm.gpg] https://packages.buildkite.com/helm-linux/helm-debian/any/ any main" | sudo tee /etc/apt/sources.list.d/helm-stable-debian.list
sudo apt-get update
sudo apt-get install helm
helm repo add ntnx-charts https://nutanix.github.io/helm-releases && helm repo update ntnx-charts
helm repo update
Once installed, verify Helm is available before proceeding to kubeconfig and permission setup.
Step 5: Configure kubectl permissions
Before installing any platform components, ensure your user has the correct permissions and kubeconfig access. This avoids subtle permission issues later when operators and controllers are installed.
Apply the following steps:
sudo usermod -a -G microk8s $USER
mkdir -p ~/.kube
sudo chown -R $USER ~/.kube
After running these commands, reset your session (log out and back in) so group membership changes take effect or perform a reboot. Once complete, kubectl should be able to communicate with the MicroK8s cluster without requiring elevated privileges.
# reset session
microk8s config > .kube/config
Step 6: Enable required MicroK8s services
MicroK8s ships with a minimal footprint by default. For Nutanix Enterprise AI to function correctly, we explicitly enable the services it depends on.
Enable the following MicroK8s add-ons:
microk8s enable dns
microk8s enable cert-manager
microk8s enable metallb:10.54.82.46-10.54.82.50
microk8s enable ingress
microk8s enable hostpath-storage
microk8s enable dashboard
microk8s enable nvidia
microk8s enable metrics-server
microk8s enable observability
Why these matter
- DNS – Core service discovery for all workloads
- cert-manager – Certificate lifecycle for gateways and services
- MetalLB – LoadBalancer IP allocation in a bare-metal environment
- Ingress – North–south traffic into the cluster
- hostpath-storage – Persistent storage for a single-node lab
- Dashboard – Optional visibility during validation
- NVIDIA – GPU enablement where supported
- Metrics Server – Resource metrics for scheduling and scaling
- Observability – Baseline telemetry and cluster insight
Once these are enabled, the cluster is functionally ready to accept higher-level platform components.
Step 7: Install Envoy Gateway
This is where the lab starts to become consumable.
Envoy Gateway provides a consistent, controllable entry point into the cluster, which matters because model endpoints and platform services need a predictable way to be reached, secured, and managed.
Install Envoy Gateway and wait for it to become available:
helm install eg oci://docker.io/envoyproxy/gateway-helm --version v1.5.0 -n envoy-gateway-system --create-namespace
echo -e "\e[33mChecking status of Envoy Gateway\e[0m"
kubectl wait --timeout=5m -n envoy-gateway-system deployment/envoy-gateway --for=condition=Available
If the deployment does not become available within the timeout, stop here and inspect the envoy-gateway-system namespace. It’s far easier to fix gateway readiness now than to debug failed endpoint exposure later.
Step 8: Install KServe
KServe is the layer that turns infrastructure into something developers can actually use. It is responsible for model serving, inference endpoints, and request routing once models are deployed.
In this lab we deploy KServe in RawDeployment mode and disable automatic ingress creation, as Envoy Gateway is handling north–south traffic.
Install KServe and its CRDs:
export KSERVE_VERSION=v0.15.0
helm upgrade --install kserve-crd oci://ghcr.io/kserve/charts/kserve-crd --version ${KSERVE_VERSION} -n kserve --create-namespace
helm upgrade --install kserve oci://ghcr.io/kserve/charts/kserve --version ${KSERVE_VERSION} --namespace kserve --create-namespace \
--set kserve.controller.deploymentMode=RawDeployment \
--set kserve.controller.gateway.disableIngressCreation=true
echo -e "\e[33mWaiting 45 seconds for kserve to enable\e[0m"
sleep 45
kubectl get pods -n kserve
If pods remain pending or crash-looping at this stage, stop and inspect before continuing. KServe stability is foundational for everything that follows.
Step 9: Install required CRDs
Before installing Nutanix Enterprise AI components, we ensure the supporting control-plane primitives are present. One of the most important is OpenTelemetry, which underpins metrics, traces, and service insight across the platform.
Install the OpenTelemetry Operator:
helm upgrade --install opentelemetry-operator opentelemetry-operator --repo https://open-telemetry.github.io/opentelemetry-helm-charts --version=0.93.0 -n opentelemetry --create-namespace --wait
echo -e "\e[33mWaiting 30 seconds to check status\e[0m"
sleep 30
kubectl --namespace opentelemetry get pods -l "app.kubernetes.io/instance=opentelemetry-operator"
If the operator is not running cleanly at this stage, pause and resolve it before continuing. Observability components are foundational, and failures here tend to cascade later when AI services attempt to emit telemetry.
Step 10: Install NAI Operators
This is the point where Nutanix Enterprise AI becomes aware of the cluster.
The NAI Operators reconcile Nutanix Enterprise AI custom resources, manage lifecycle events, and keep higher-level services healthy.
Install the NAI Operators using your Nutanix container registry credentials:
helm upgrade --install nai-operators ntnx-charts/nai-operators --version=2.5.0  -n nai-system --create-namespace --wait \
        --set imagePullSecret.credentials.username=<USERNAME> \
        --set imagePullSecret.credentials.email=<EMAIL ADDRESS> \
        --set imagePullSecret.credentials.password=<API KEY> \
        --insecure-skip-tls-verify
echo -e "\e[33mWaiting 30 seconds to verify operators running\e[0m"
sleep 30
kubectl --namespace nai-system get pods
You should see the operator pods running cleanly in the nai-system namespace. If image pull errors appear here, they almost always relate to registry credentials or API key scope, fix those before moving on.
Step 11: Install NAI Core
This is the point where the platform fully comes together.
NAI Core deploys the foundational services that bind model serving, telemetry, storage, and lifecycle control into a coherent Nutanix Enterprise AI platform. Once this step completes successfully, the environment transitions from infrastructure assembly to something developers can actually use.
First, add and update the Nutanix Helm repository, then pull the chart locally so values can be reviewed or adjusted if needed:
helm pull ntnx-charts/nai-core --version=2.5.0 --untar=true
Install NAI Core using your Nutanix registry credentials and lab-appropriate settings:
helm upgrade --install nai-core ntnx-charts/nai-core --version=2.5.0 -n nai-system --create-namespace --wait \
        --set imagePullSecret.credentials.username=<USERNAME> \
        --set imagePullSecret.credentials.email=<EMAIL> \
        --set imagePullSecret.credentials.password=<API KEY> \
        --set naiApi.storageClassName=microk8s-hostpath \
        --set defaultStorageClassName=microk8s-hostpath \
        --set naiMonitoring.opentelemetry.common.resources.requests.cpu=0.1 \
        --set nai-clickhouse-keeper.clickhouseKeeper.resources.limits.memory=1Gi \
        --set nai-clickhouse-keeper.clickhouseKeeper.resources.requests.memory=1Gi \
        -f ./values.yaml
Home lab considerations
- Storage classes are explicitly set to
microk8s-hostpathfor single-node persistence - Resource requests and limits are intentionally conservative to avoid memory pressure
- ClickHouse memory is constrained to prevent instability on smaller systems
If this step fails, stop and resolve it before continuing. Issues here are typically related to registry credentials, storage class mismatches, or insufficient resources, and they are far easier to fix now than later in the process.
Step 12: Apply certificates to the gateway
The final step is securing access to the platform.
At this stage, all core services are running and exposed internally. Applying certificates to the gateway ensures external access is encrypted and that clients can trust the endpoints being presented.
Create a TLS secret in the nai-system namespace using your existing certificate and private key:
kubectl -n nai-system create secret tls nai-cert --cert=./fullchain1.pem --key=./privkey1.pem
kubectl patch gateway nai-ingress-gateway -n nai-system --type='json' -p='[{"op": "replace", "path": "/spec/listeners/1/tls/certificateRefs/0/name", "value": "nai-cert"}]'
Once applied, the gateway will begin serving traffic using the provided TLS certificate.
To check the IP being served run the following command:
kubectl get svc -n envoy-gateway-systemThis should produce the IP Addresses for the gateway IP, specifically for the load balancer, and the external port mappings for 80 and 443, this is the IP address you you need to use to access from within the node itself, for external access, use the bare metal host IP and the 443 port specified in the above command output.
https://<IP Address of baremetal host>:<HTTPS PORT ID>
And you should see:
Notes for a lab environment
- Certificates can be self-signed or publicly issued; trust is entirely your responsibility in a lab
- Listener indexes may differ if the gateway definition has been modified, adjust the patch path accordingly
- If clients fail to connect after this step, inspect the gateway and listener status before revisiting earlier components
With certificates in place, the platform is now fully assembled and safely consumable.
What this lab proves
Even in a lightweight, single‑node environment, Nutanix Enterprise AI demonstrates something important:
AI platforms don’t have to be fragile or chaotic.
The same architectural principles scale:
- From a MicroK8s lab
- To a datacenter
- To edge locations
- To public cloud
The workflows stay recognisable. The operational model stays consistent.
That consistency is what shortens time‑to‑value.
Final thoughts
This lab isn’t about performance or scale.
It’s about confidence:
- Confidence that the stack works
- Confidence that developers can consume it
- Confidence that production won’t be a surprise
If you can make AI boring in a home lab, you’re on the right path.
I have created a script that will perform the following:
- Check that IPv6 is enabled and exit if it is not
- Prompt the user to verify that the keychain and private key are in the ./ folder
- Prompt the user for their Nutanix Repository details for docker.io
- Install all the above components
runme1st.sh can be downloaded here (Right click and choose Save As…..)
naiinstall.sh can be downloaded here (Right click and choose Save As…..)
The values.yaml file can be downloaded here
NEW FOR NAI 2.7 – nai27install.zip
NAI 2.7 was released and the updated install files will provide all the required config including using the latest stable version of Microk8s even on Ubuntu 26.04, and will of course include the AI Gateway